WARNING:
This project needs to be done in 2 days.
Let's make some angry birds!
(I'm starting from easy to hard, so you can get a warm up.)

First you will need:
Fondant (red, orange, yellow, green, blue, black and white)
Glue (Vodka or Tylose Powder mixed with water or Piping Gel)
Paint Brush
Food Color Markers
Exacto Knife
Powdered Sugar (in case the fondant gets sticky)
Toothpicks

Day 1:
Mold all the bodies of your angry birds and pigs. Find a picture online or use the game as a reference.
Pigs first.
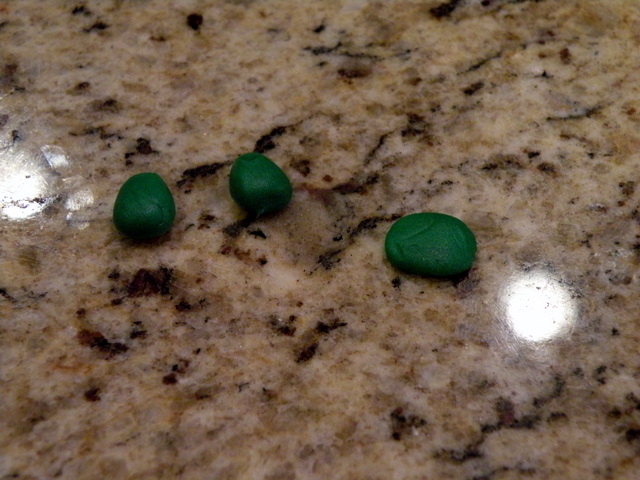
It doesn't look like much but these 3 little balls are for the ears and nose. For the ears make two little cones equal in size and for the nose make an oval and squish it flat.

To adhere the ears poke two holes on the top of the pigs heads with a toothpick, then put the cone over the hole and gently push some the "ear" into the hole in the center to create the curved look. It is also helpful to put a little glue under the cone to add staying power. Do this for both ears.

Once both ears are attached add a little glue to the nose and center it on the pigs face.

This is how all of your pigs should look at the end of Day 1.
Allowing your pigs to dry over night will make it easier to add details and not squish the body.
(Sidenote: If you want to make a pig with a crown or a helmet or add any detail that you'll need to stick into the body, you need to do that on Day 1.)
**If you intend to add these to a cake, the cake needs to be made on Day 1 for adequate cooling.

Day 2
Roll out a little piece of white fondant. I use a round piping tip to cut out the holes and then I flatten slightly with my finger. (I either use a #12 tip or a #2A, it's about the size of a pencil eraser is round.)


Then add a little glue to the back of the eyes with your paint brush and adhere them to the pig face.

I allow the glue to set for a few minutes. (Technically for the pigs you could glue the eyes on day one, but not the birds.)
To finish them off use your food color markers to add the eyeballs, eye brows, mouths and nose holes.
(If you KNOW, these will not be eaten you could use a regular sharpie, but generally kids eat them so I wouldn't take the risk, but I understand not wanting to buy something for just one or two uses.)
Ta-Da! The enemy is finished!

Next up - the Blue Birds.
So you have your bodies already made, next it's time to add some feathers.

Take a small ball of blue fondant and roll it out like a worm. Then slightly flatten it with your fingers so it is not round. Then fold it in half with one side being slightly longer. Then bring the folded corner to a bit of a point.

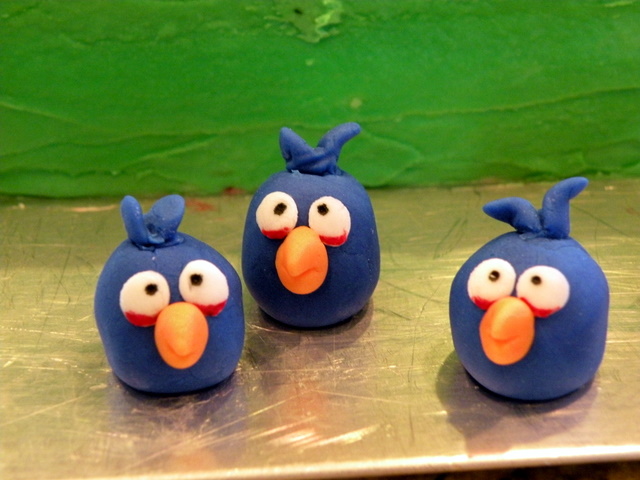
Use your toothpick to put a hole in the top of the head - you will need to wiggle it around some to make the hole larger to fit it the feathers. Add some glue to the hole and stick your feathers in - use the toothpick to help guide them in. (Make sure the longer feather is in the back.)

Hopefully it will look something like this. (I don't think I added tail feathers to the blue birds, but feel free, just follow the same steps, but add a third feather.)

Day 2:
Roll out your white fondant and cut out the eyes. Make a small cone shape with some orange fondant.

Use the exacto knife to CAREFULLY cut and shape the orange cone to form a beak.

Glue the beak on first and then the eyes.

Finally draw on the eye balls and for the blue birds add a thin red line at the bottom of each eye.
Way to go! You now have pigs and blue birds.


Up next the yellow and red birds.

Tip: I always make my own fondant, but because of the number of colors I'm encouraging you to just go buy some. Wilton has a primary colors pack that pretty much has everything you need besides the black and white. For the orange take some yellow and add a TINY bit of red. Duff also has some great pre-made fondant. Use whatever suits you. But if you don't use fondant full time this is the quickest, easiest and cheapest way. (Use a 40% off coupon at Michael's or Hobby Lobby.)

Feel free to email me if you have any questions.
Good luck!